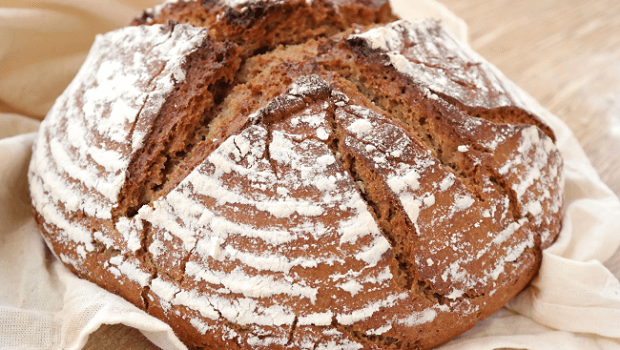
When translated, bauernbrot means: farmers bread. Breads are an integral part of the German diet. Hence you will find a wide variety of breads within their cuisine. Bauernbrot has the most delightful rich brown crust and the crumbs are extremely tight at the same time they are tender. It also holds significant popularity in Switzerland.
The typical preparation requires a combination of rye, wheat flour, water, salt, yeast, and a leavening agent for the dough. Its origin stories do not go that far back. Ecole Professionnelle de Richemont in association with the Swiss Bakers’ Association, they together in 1955 came up with this recipe while discovering ways to utilize surplus milk.
Bauernbrot has managed to reach great heights of popularity and is therefore available in most supermarkets and bakeries across Germany and Switzerland.
For some it is just about wet doughs and the slow rising giant loaves whereas for others, particularly Germans it is a matter of pride and everyday living. In Germany there are many homes where you can still find this bread being baked in an old stone oven. Furthermore, most reviewers as well regard this to be the best German bread of all time.
Recipe
There is not just one recipe for bauembrot. Households and regional variations are quite common. Also, in case the requirement of extra starter may arise, it is advisable to add 2 cups more of each water and flour.
Moreover, in case you do not appreciate the taste of rye then it can also be completely eliminated. A whole wheat bread can be made, you will just have to take out half of the bread flour and replace it with wheat flour. And also increase the proportion of water.
Among the other additions you might as well just use: sesame seeds, sunflower seeds, linseeds, flaxseeds, cracked wheat, rye or spelt into the flour mixture.
In case you desire a dark crust, then take any of the three: buttermilk, coffee or yogurt and brush the dough with it. Baking stones have shown to bring about even better crust developments.
While preparing this bread the environment will have to be controlled to a great extent, that is minding the humidity and heat is very important. Therefore many people prefer to start their preparation very early in the day.
Ingredients:
For the dough preparation
- Bread flour: ¾ cup
- Rye flour: ¾ cup
- Honey or malt syrup: 3 tablespoons
- Lukewarm water: 1 ½ cups
- Instant yeast: ½ teaspoon
For the flour mixture
- Bread flour: 2 ½ cups
- Caraway seeds: 2 tablespoons
- Salt: 1 ½ teaspoons
- Instant yeast: ½ teaspoons
- Oil: 1 tablespoon
- Cornmeal: about a cup
The process
Firstly you will be required to take a large sized, heat proof clear bowl. Now, add the ingredients as listed in the dough preparation section one at a time and keep on mixing them. The idea is to reach the state of smooth consistency. When done you will be required to keep the mixture on the side so that the yeast can get activated and do its job.
Next, in a completely separate bowl of similar measures add the ingredients except the cornmeal and oil in it. Mix them well and then pour it over the mixture prepared above and do not stir. You will have to let it be, but simply cover the bowl with a plastic wrap or a clean towel and let it be on the side for at least 120 minutes. This time can go up to as much as 5 hours. The idea here is to let bubbles appear on the dough mixture and then those bubbles should travel all the way up to the flour mixture. The longer you let the mixture rest the better are the flavors able to develop.
Oil can now be added to the flour mixture and also use a wooden spoon to stir the mixture. This time you will have to properly mix, straight from the bottom right upwards with strong movements. The dough should be able to come together and attain a proper shape. Next, you can move the dough to a proper work surface whereon it will be required to be kneaded for at least 10 minutes. It should give you the feel of being smooth and elastic, though it is also likely that the sticky element of the dough might be also there. So, to avoid that using a little bit of flour and then kneading it further should do the trick. Then set the dough aside again for about 10 minutes and post the passage of that time, kneads again gently for 5 to 10 more minutes.
After all of that is done take another bowl of the same dimensions. Oil the inside of the bowl as lightly as possible and also the dough. Place the dough inside and cover the top of the bowl with clean towel or a plastic wraps. Now, place the dough in a draft-free zone of the kitchen and wait for almost 2 hours. As the time passes you will realize that the dough will swell up to almost double of its size.
Now, prepare a work surface by gently sprinkling the flour onto it and then finally placing the dough there. Then deliver few light punches and then lightly knead for a few minutes. Next, return the round shape to the dough and then place it back in the bowl and cover. Let it rise again for about 40-45 minutes.
Now, immediately preheat the oven at 450 degree Fahrenheit. Also, place the shelf at the lowest level and put a metal pan over it. Take a baking sheet and sprinkle cornmeal over it, place the dough onto this baking sheet and with very light hand oil the dough. Again cover it with a plastic wrap and put it to rest for an hour.
You will now be required to take a sharp knife and slash three parallel lines and three lines which go perpendicular to them on top of the dough. And by using a spray bottle, gently spray once or twice over the dough with water.
For the final step, put the baking sheet in the oven and to create steam, pour one cup of water into the small pan. Let the dough bake for 15 minutes and then decrease the heat to 400 degree Fahrenheit and let the baking process go on for another 35 to 45 minutes. Using a cooking/baking thermometer check the internal temperature of the cake and it should measure 190 degree Fahrenheit. And finally set the bread out and allow it to cool. Store it in a relatively drier space and enjoy.